A Beginner’s Guide to Unsplash API in JavaScript

The Unsplash API is a great tool for any JavaScript developer, regardless of their experience level. It makes it easy to find and use high-quality images in your projects. This guide will show you, step-by-step, how to install the Unsplash library in your Node.js project, make API calls to search for photos, and save the returned images to your local drive. With this guide, you will quickly become an expert in using the Unsplash API.
Heads up, this tutorial is the second part of my series on using JavaScript to Automate Blogging. I highly recommend checking out the first tutorial, “Introduction to OpenAI API in JavaScript” before continuing as it covers project setup and gives you an idea of what we’re trying to accomplish here.
You can find the full code on GitHub at this link.
Prerequisites
- Basic knowledge of JavaScript
- A ready-to-go Node.js project
- An Unsplash developer account
What you’ll learn
- How to obtain an Unsplash API key: walk you through the process of creating an Unsplash developer account, so you can generate an API key and access the Unsplash photo library.
- How to install the relevant NPM packages: You’ll learn about the different packages that can help you integrate the Unsplash API into your JavaScript project.
- JavaScript code snippets on making Unsplash API calls: Through this guide, you’ll gain a better understanding of the Unsplash API and how to make calls to search and return photos in JavaScript. Also, the JavaScript code for saving the returned photos to your local drive.
💡Level up your JavaScript skills with this comprehensive guide on various programming paradigms in JavaScript:
👉 To read more such articles, sign up for free on Differ.
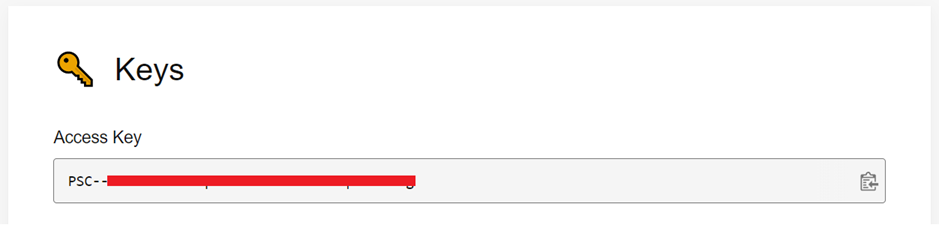
Obtain an Unsplash API key
- Go to the Unsplash website and sign up for an account.
- Once you have an account, go to the developer section of the website and click on the “Register a new application” button. (Note: Demo apps are limited to 50 reqests per hour.)
- Once you have submitted the form, you will be provided with an API key that you can use to access the Unsplash API.
Install NPM packages
Alright, as a follow-up to the last tutorial in this series, you’ll need to run npm install unsplash-js node-fetch in your terminal to install two more npm packages before continuing. This is a quick step that’ll make sure you’re all set to move forward with this tutorial and build upon what you’ve learned before.
npm install unsplash-js node-fetchOur folder structure now includes the new images and unsplash folders in the project. It should look something like this:
📦wordpress-automation
 ┣ 📂node_modules
 ┣ 📂src
 ┃ ┣ 📂images
 ┃ ┃ ┗ 📜coding on laptop.jpg
 ┃ ┣ 📂openai
 ┃ ┃ ┗ OpenAI.js
 ┃ ┣ 📂unsplash
 ┃ ┃ ┗ 📜Unsplash.js
 ┣ .env
 ┣ .gitignore
 ┣ .prettierrc
 ┣ index.js
 ┣ package-lock.json
 ┗ package.json
Make Unsplash API call and save the returned photo
// Unsplash.js

import { createApi } from 'unsplash-js';
import fetch from 'node-fetch';
import fs from 'fs';


export class Unsplash {
  constructor(accessKey) {
    // Create an instance of the Unsplash API using the provided access key
    this.unsplash = createApi({ accessKey, fetch });
  }

  async getPhoto(type, query, page = 1, per_page = 8, orientation = 'landscape' ) {
    try {
      // Send a request to the Unsplash API to search for photos
      const response  = await this.unsplash.search.getPhotos({
        query,
        page,
        per_page,
        orientation,
      });

      // Select a random photo from the response
      const aRandomPhoto = response.response.results[Math.floor(Math.random() * 8)];
      // Get the regular size photo url
      const photoUrl = aRandomPhoto.urls.regular;
      // Fetch the photo
      const photo = await fetch(photoUrl);
      // Get the photo buffer
      const photoBuffer = await photo.arrayBuffer();
      // Create caption for the photo - in Unsplash attribution style
      const caption = `
        <a style="text-decoration: none; cursor: default; pointer-events: none; color: inherit;">
          Photo by
        </a>
        <a href="${aRandomPhoto.user.links.html}" rel="noopener ugc nofollow" target="_blank">
          ${aRandomPhoto.user.name}
        </a>
        on
        <a href="https://unsplash.com" rel="noopener ugc nofollow" target="_blank">
          Unsplash
        </a>
      `;

      // Check the value of the "type" parameter and execute the corresponding code block
      switch (type) {
        case 'buffer':
          // Convert the photo buffer to Uint8Array
          const data = new Uint8Array(photoBuffer);
          console.log(`${query}.jpg buffer ready`);
          // Return an object containing the photo's buffer and attributes
          return {
            attributes: {
              caption: caption,
              title: query.toLowerCase(),
              alt_text: `an image of ${query.toLowerCase()}`,
            },
            buffer: data
          };
        case 'file':
          // Convert the photo buffer to a Buffer
          const image = Buffer.from(photoBuffer);
           // Create a file path for the photo
          const filePath = `src/images/${query}.jpg`
          // Write the photo to the file system
          await fs.promises.writeFile(filePath, image);
          console.log(`${query}.jpg saved`);
          break;
        default:
          console.log(`Invalid type: ${type}`);
          return null;
      }
    } catch (error) {
      console.log(error);
      return null;
    }
  }

}
In this instantiable class Unsplash.js, the code starts by importing the necessary modules and packages:
createApimethod from the unsplash-js package is used to create an instance of the Unsplash API.fetchpackage is used to make a GET request to download the photo.- built-in
fs(File System) module is used to create a write stream to save the photo.
Then, I define an async function getPhoto that wraps the entire code. Inside the function, I use the try-catch block to handle any error that may occur while making the requests or saving the photo.
Inside the try block, I use the search.getPhotos(params) method of the Unsplash API to search for photos with the parameters query, page, per_page and orientation.
You can also customize the per_page,page,orientation and query to get the specific photos you want and also you can check the json response for the result and able to use different sizes of the image by changing urls.raw, urls.full, urls.regular, etc.
Then, I use the fetch package to make a GET request to the photo's download link by providing the randomized regular size of the photo using aRandomPhoto.urls.regular and I wait for the response.
The arrayBuffer() method is to get the photo buffer.
I use fs.promises.writeFile(filePath, image) method to save the photo to the local drive, it will write the buffer to the file.
In case of any failure, I use the catch block to log the error to console.
Tips: If you want to randomly select one of the photos returned by the API, you can use the
Math.floor(Math.random() * 8)method. This will generate a random number between 0 and 9, which can be used as the index of the result you want to select.
// index.js

import { Unsplash } from "./src/unsplash/Unsplash.js";
import dotenv from 'dotenv';
dotenv.config();

const unsplash = new Unsplash(process.env.UNSPLASH_KEY);
await unsplash.getPhoto('file', 'coding on laptop');
Just like in the first tutorial, in the index.js file, we imported the Unsplash.js class and created a new instance of it by passing in the UNSPLASH_KEY. We stored the API key in a .env file for added security. Then we ran the getPhoto method by passing in the type of response we wanted and the search phrase for the photo. And voila! we saved a image named coding on laptop.jpg in the src/images/ folder.
Conclusion
The Unsplash API is a powerful tool that makes it easy to find and use beautiful images in your projects. The unsplash-js package simplifies the process of making API calls in Javascript.
In this guide, you learned how to install the necessary packages, make API calls to search for photos, and save the returned images to your local drive. You also learned how to handle errors and how to access a random photo from the results returned by the API.
As a next step, you can build upon this and explore more options available in the Unsplash API such as pagination, download the photos of different sizes, download the photos of different orientation, and also you can use the photos for commercial and non-commercial use by following the guidelines provided by unsplash. You can also try using the API with different libraries like Axios and explore the other features provided by Unsplash API.
Further Readings
Blog Automation with JavaScript Tutorial Series
- OpenAI API (Part I & Part II): Automated Content Generation
- Unsplash API: Automated Image Selection for Blog Posts
- WordPress API: Effortless Blog Content Uploading
- Blogging Automation: Bring everything together
Official Documentaions
- The Unsplash API documentation
- The unsplash-js GitHub repository
- The Unsplash API terms of use
Thank you for reading! If you’ve enjoyed the tutorials and stories I’ve shared and would like to support my writing, please consider signing up to become a Medium member using my referral link.
In Plain English 🚀
Thank you for being a part of the In Plain English community! Before you go:
- Be sure to clap and follow the writer ️👏️️
- Follow us: X | LinkedIn | YouTube | Discord | Newsletter
- Visit our other platforms: CoFeed | Differ
- More content at PlainEnglish.io
- Tingles ASMR | One-Stop Shop for ASMR Content | IOS — Android